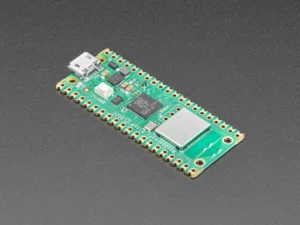
In today’s interconnected world, communication is key. Whether it’s for IoT applications, remote monitoring, or simple notifications, the ability to send SMS messages from a microcontroller can be incredibly useful. In this guide, we’ll explore how to leverage the power of the Raspberry Pi Pico W and the A9G board to send SMS messages effortlessly.
o embark on this journey, ensure you have the following:
Raspberry Pi Pico W

A9G board
USB cables for both devices
Jumper wires
Computer equipped with Thonny IDE or any compatible IDE
Fundamental understanding of Python programming
Connect the Raspberry Pi Pico W to your computer using a USB cable.
Power up your A9G Board by Connecting the A9G board to your computer via USB cable.
Connect Raspberry Pi Pico with A9G as per below connection Diagram.

Launch Thonny IDE and create a new Python script.
Write and upload the requisite code to establish serial communication with the A9G board.
Here’s a Python script to send an SMS using the Raspberry Pi Pico W and the A9G board:
					# Import required libraries
import machine
import time

# Configure UART for communication with the A9G module
uart = machine.UART(0, baudrate=115200, tx=machine.Pin(0), rx=machine.Pin(1)) # UART0 on Pico

# Function to send AT commands and receive responses
def send_at_command(command):
    uart.write(command + '\r\n')       # Send the command
    time.sleep(3)                       # Wait for response
    response = uart.read()              # Read the response
    if response:
        print("Response:", response.strip())  # Print the response
        return response.strip()
    else:
        print("No response received.")  # Print if no response received
        return None

# Function to send an SMS
def send_sms(phone_number, message):
    # Set text mode
    response = send_at_command('AT+CMGF=1')
    if not response or b'OK' not in response:
        print("Failed to set text mode.")
        return

    # Set recipient number
    response = send_at_command('AT+CMGS="{}"'.format(phone_number))
    if not response or b'>' not in response:
        print("Failed to set recipient number.")
        return

    # Send message
    response = send_at_command(message)
    if not response:
        print("Failed to send message.")
        return

    # Send Ctrl+Z to end message
    uart.write(chr(26))
    time.sleep(1)

# Example usage
phone_number = '+91XXXXXXXXXX'  # Replace with recipient's phone number
message = 'Hello, this is a test message from Raspberry Pi Pico W with A9G board!'
send_sms(phone_number, message)
With the provided code and setup instructions, you can now easily send SMS messages using the Raspberry Pi Pico W and the A9G board. Whether you’re building IoT applications or remote monitoring systems, the ability to send SMS messages adds a powerful communication layer to your projects. Experiment with different messages and recipients to explore the full potential of this functionality!
Copyright © 2024 Fusion. All Rights Reserved.